Pages
▼
May 23, 2019
Project a Month: Sweet Home Ebook by Cutesy Crafts
Remember that lovely Sweet Home Embroidery Ebook by Cutesy Crafts? Jessica was kind enough to share a copy of her Ebook with me, and I was determined to stitch something from it!
I chose the "Home" pattern - which has a lovely palette of navy blue, gray, coral and teal - colors I always love to stitch with! And yes, I did 2 projects this month, with time to spare. I'm glad I'm gaining speed on my finishes!
I started with the appliqué part first, and can I just admit, appliqué terrifies me?
I used the same Ecru quilting cotton for the little house that I used in the Mother's Day Stitchalong, and a navy linen I've used for several projects now.
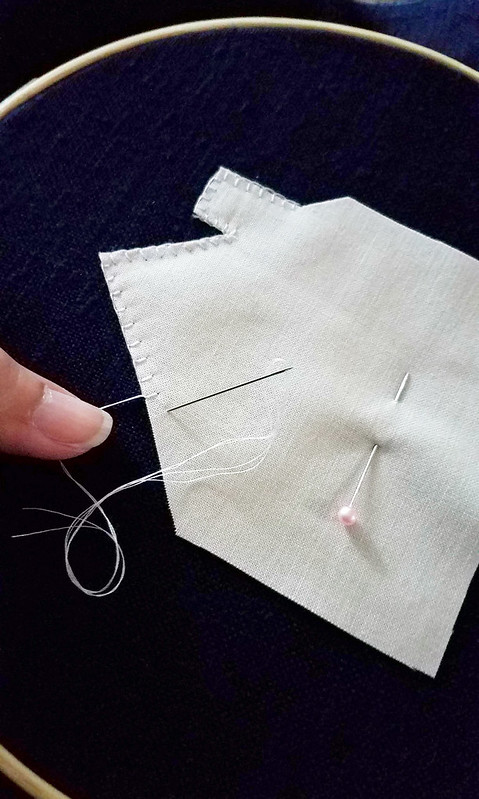
I didn't have the paper-backed interfacing that the pattern calls for, so instead I ironed on a lightweight interfacing and stitched it to my fabric the old fashioned way, with pins to secure it and a blanket stitch:
And that's when I realized, appliqué really isn't that terrifying. Why had I been waiting so long to just try it?
As I stitched, it finally made sense to me that the blanket stitches protect and secure the raw edges of the appliqué. I also think the lightweight interfacing helped keep the raw edges secured and the appliqué house flat, but I'm not 100% sure on that.
And voila! My first-ever appliqué done! You might notice that there is a mark from the pin I used to hold it in place, but I didn't stress about that, and the mark came out easily after washing and ironing later...
When it came to transferring the pattern, I didn't have any advanced technique - I used tracing paper to prick the outline of the design, and filled in the pinpricks with chalk. Then I connected the dots using a chalk pencil.
If I had white carbon paper, I'd have used that instead - the pinprick method was messy and laborious!
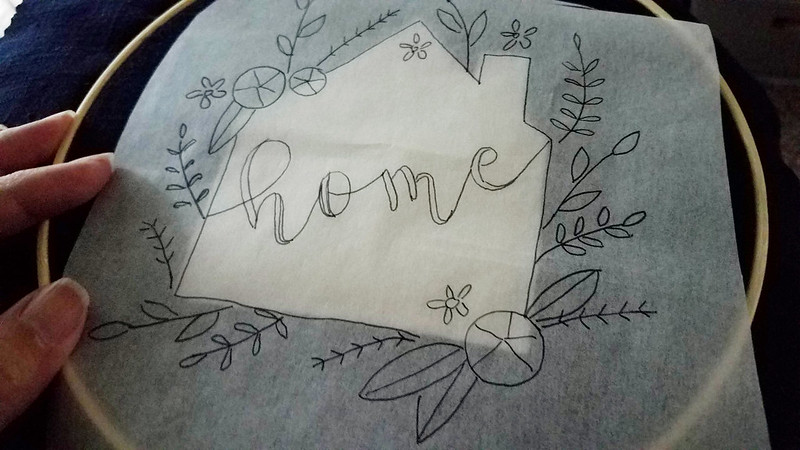
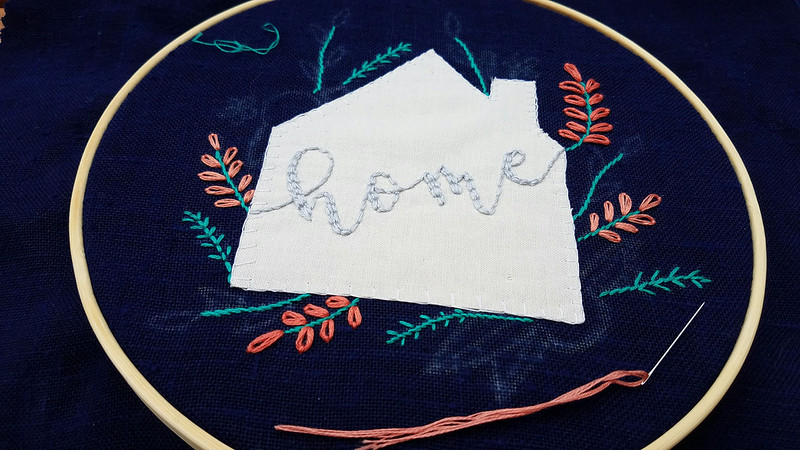
I could have used an iron on transfer pencil at this point, but I didn't want to have to flip the image, trace, and iron. So instead I stitched directly over the tracing paper, and picked out the paper after stitching:
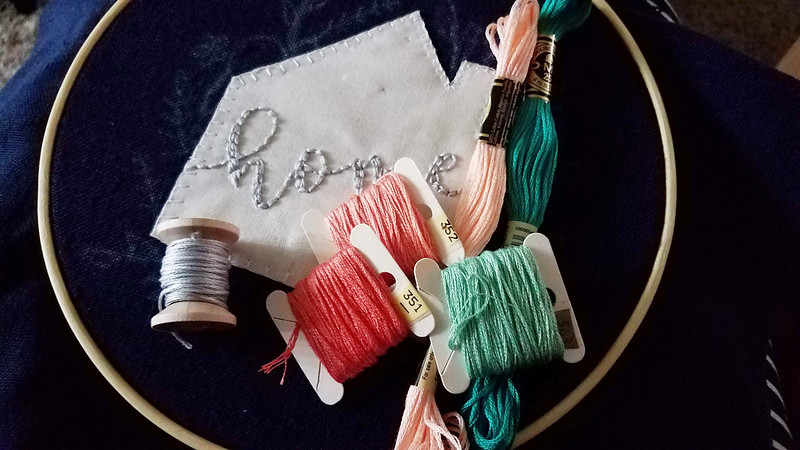
I used 6 strands of floss and back stitch for these letters, as the pattern calls for, in a technique very similar to the Mother's Day Stitchalong earlier this month.
Here's a peek at the rest of the lovely colors that pattern calls for - I did make a few substitutions - the lightest peach color was too light for me, so I chose a darker - I didn't have the darkest teal the pattern calls for, so I just used the closest shade I had.
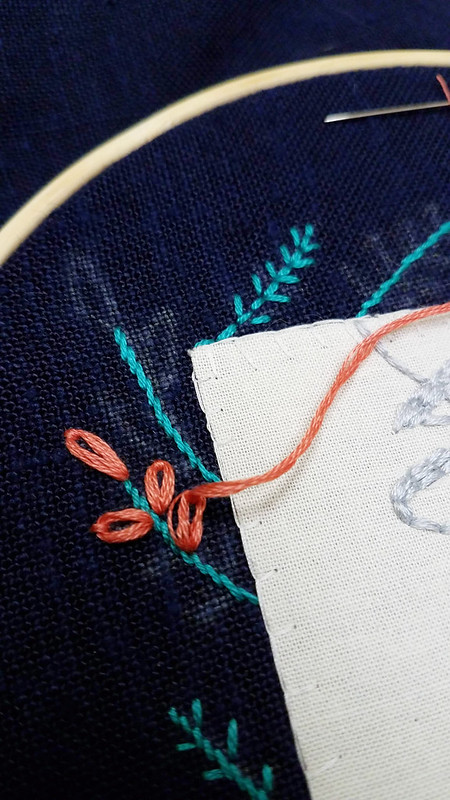
I stitched all the dark teal stems then moved on to the coral lazy daisy stitches... which brings me to this question...
Who out there hates stitching with all 6 strands of embroidery floss?
I sure do. I know this chunky look is popular with modern embroiderers on Instagram, and I love it when others use it, but my threads *always* tangle when I use all 6 strands.
There were lots of helpful suggestions on Instagram, with Jessica from Cutesy Crafts beinng kind enough to chime in - try another needle, strip your threads, try 3 strands, folded over, and I tried them all, but still I'd get the tangles you see above.
So I substituted 4 strands for the lighter coral lazy daisies, and I think they look just fine. Perhaps a tiny bit less chunky, but just as lovely!
Next I stitched the light teal leaves in a fishbone stitch - I found this stitch a bit more challenging on linen, vs. quilting cotton. It looks less clean and regular, to me.
I tried 4 strands and 3 strands of floss, I preferred the look of 3 strands, which you see here.
Next I stitched my woven wheel roses.
Those are always easy and fun.
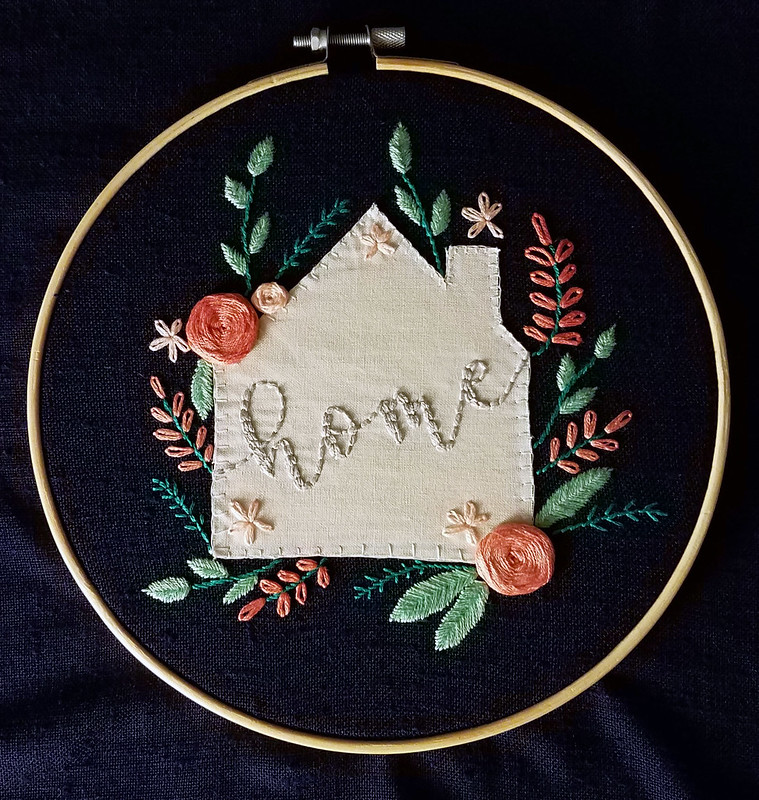
And done! I don't like to stitch my gifts right before I give them, but I at least had time to wash and press my project, which caused me some anxiety - what if the colors ran, what if the appliqué shrank (I hadn't remembered to pre-wash, of course), what if I couldn't get the wrinkles out?
But it all came out beautifully, I think! I ironed my project damp, face down on a towel, taking care not to smoosh the woven wheel roses. Then I flipped it over and very very carefully ironed the appliqué, taking care not to iron and flatten the embroidered letters.
The slight shrinking helped removed the buckling in my appliqué, so it all worked out!
This was a quick stitch- it only took me a few days, and it was very fun and lovely. If you'd like to stitch this pattern, you can find it, as I mentioned in the Sweet Home Embroidery Ebook by Cutesy Crafts, it is chock full of lovely patterns, I highly recommend it! I wouldn't be surprised if I work in another project from Jessica's Ebook later this year!







No comments:
Post a Comment