Pages

December 5, 2016

MooshieStitch Monday: Plushwork Wreath

Plushwork Wreath tutorial by Michelle for Mooshiestitch Monday on Feeling Stitchy

Today I am going to show you how to stitch a plushwork wreath for the holidays!

For best results - I highly suggest tapestry wool.

This wreath is stitched with DMC Tapestry Wool (which DMC has so kindly provided).

Plushwork Wreath tutorial by Michelle for Mooshiestitch Monday on Feeling Stitchy
DMC Green 7344 and Red 7108

For my wreath template, I cut a circle about 2.5 inches wide in diameter out of cardboard.

To start, bring your wool up through the fabric (A) and back down (B)

Plushwork Wreath tutorial by Michelle for Mooshiestitch Monday on Feeling Stitchy

Continue with your surface satin stitch - bring your wool back up next to the previous stitch on the same side.

Plushwork Wreath tutorial by Michelle for Mooshiestitch Monday on Feeling Stitchy

Then down again across the template.

Plushwork Wreath tutorial by Michelle for Mooshiestitch Monday on Feeling Stitchy

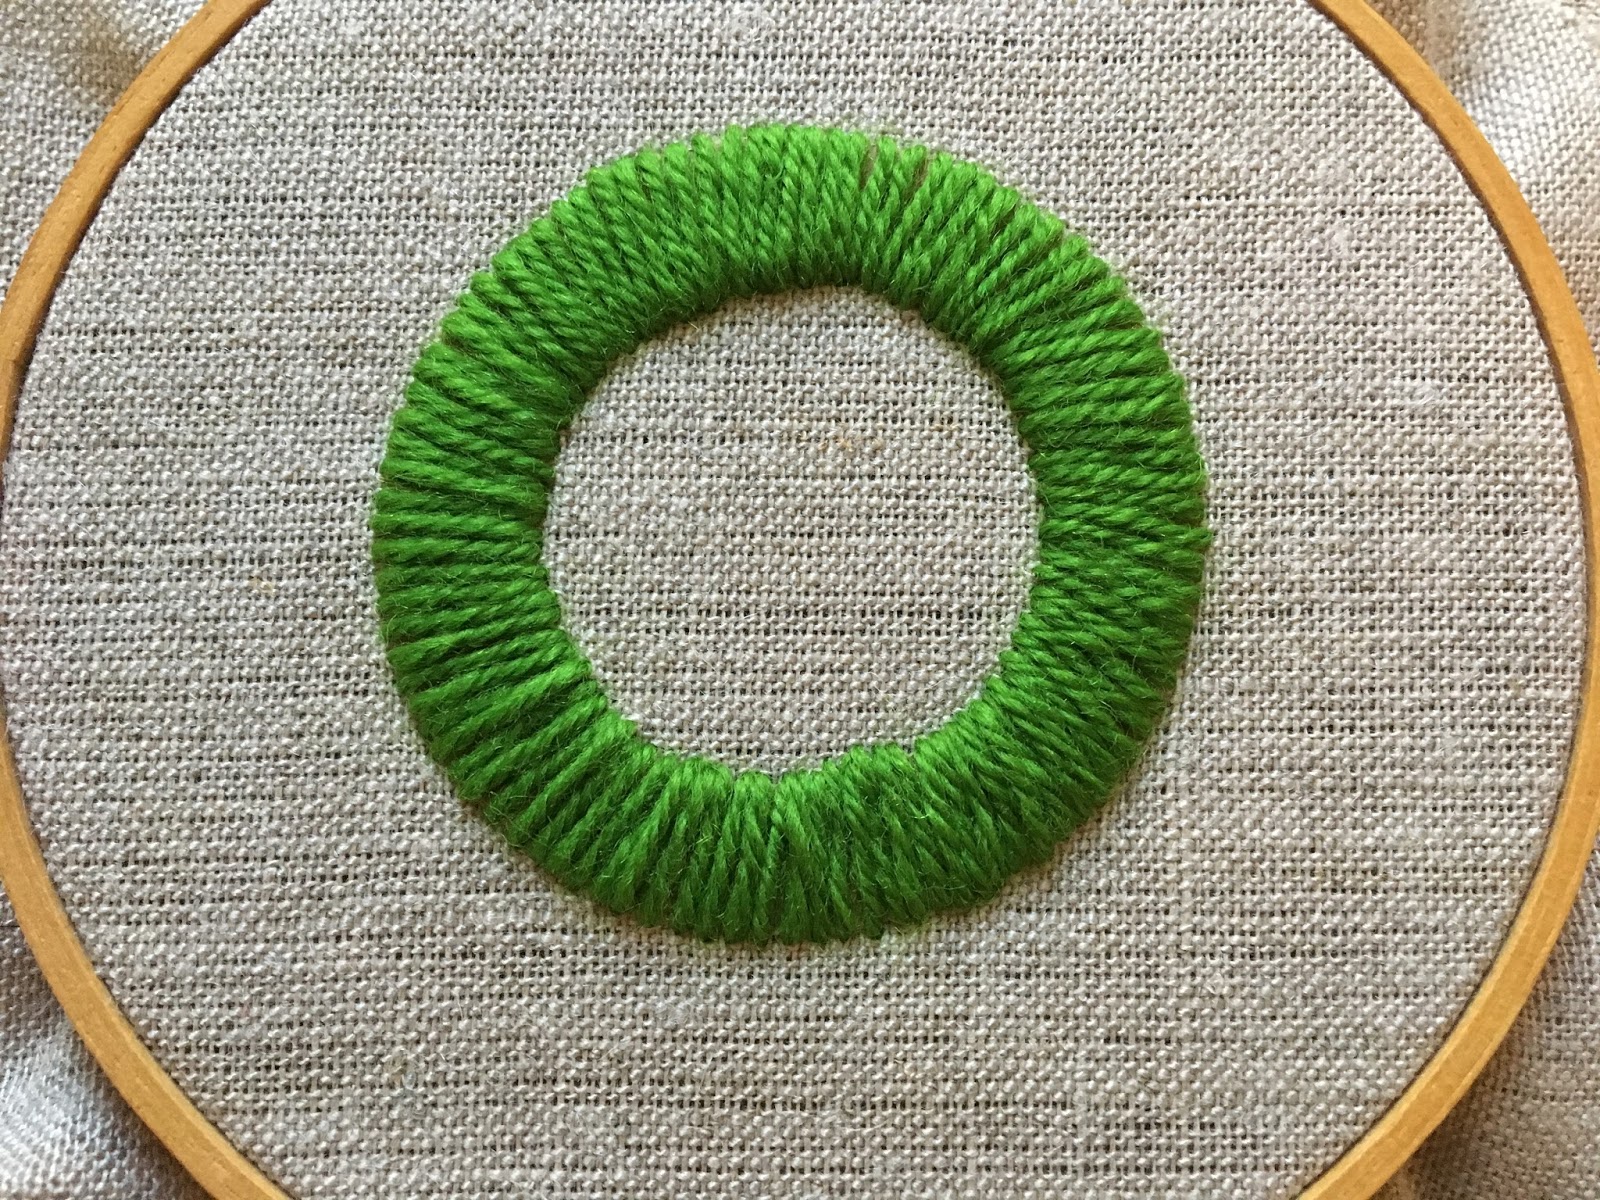
Back up again next to that stitch on the same side and repeat until your template is covered.

Plushwork Wreath tutorial by Michelle for Mooshiestitch Monday on Feeling Stitchy

Plushwork Wreath tutorial by Michelle for Mooshiestitch Monday on Feeling Stitchy

Here is the first layer complete.

Plushwork Wreath tutorial by Michelle for Mooshiestitch Monday on Feeling Stitchy

I stitched 3 layers of wool around the circle template.

Now you are ready to cut through all the layers.

Plushwork Wreath tutorial by Michelle for Mooshiestitch Monday on Feeling Stitchy

Plushwork Wreath tutorial by Michelle for Mooshiestitch Monday on Feeling Stitchy

Remove the cardboard template.

Plushwork Wreath tutorial by Michelle for Mooshiestitch Monday on Feeling Stitchy

Here it as without any fluffing - notice you can see a gap in the wool.

Plushwork Wreath tutorial by Michelle for Mooshiestitch Monday on Feeling Stitchy

I tried fluffing the wool to remove the gap / indent in the middle of the wreath but it would not go away. Maybe my template was too wide? 

Plushwork Wreath tutorial by Michelle for Mooshiestitch Monday on Feeling Stitchy

Although I was not 100% satisfied with my first attempt, I trimmed the wool a little with my scissors, fluffed it as much as I could and added a red bow and french knots for decoration.

Plushwork Wreath tutorial by Michelle for Mooshiestitch Monday on Feeling Stitchy

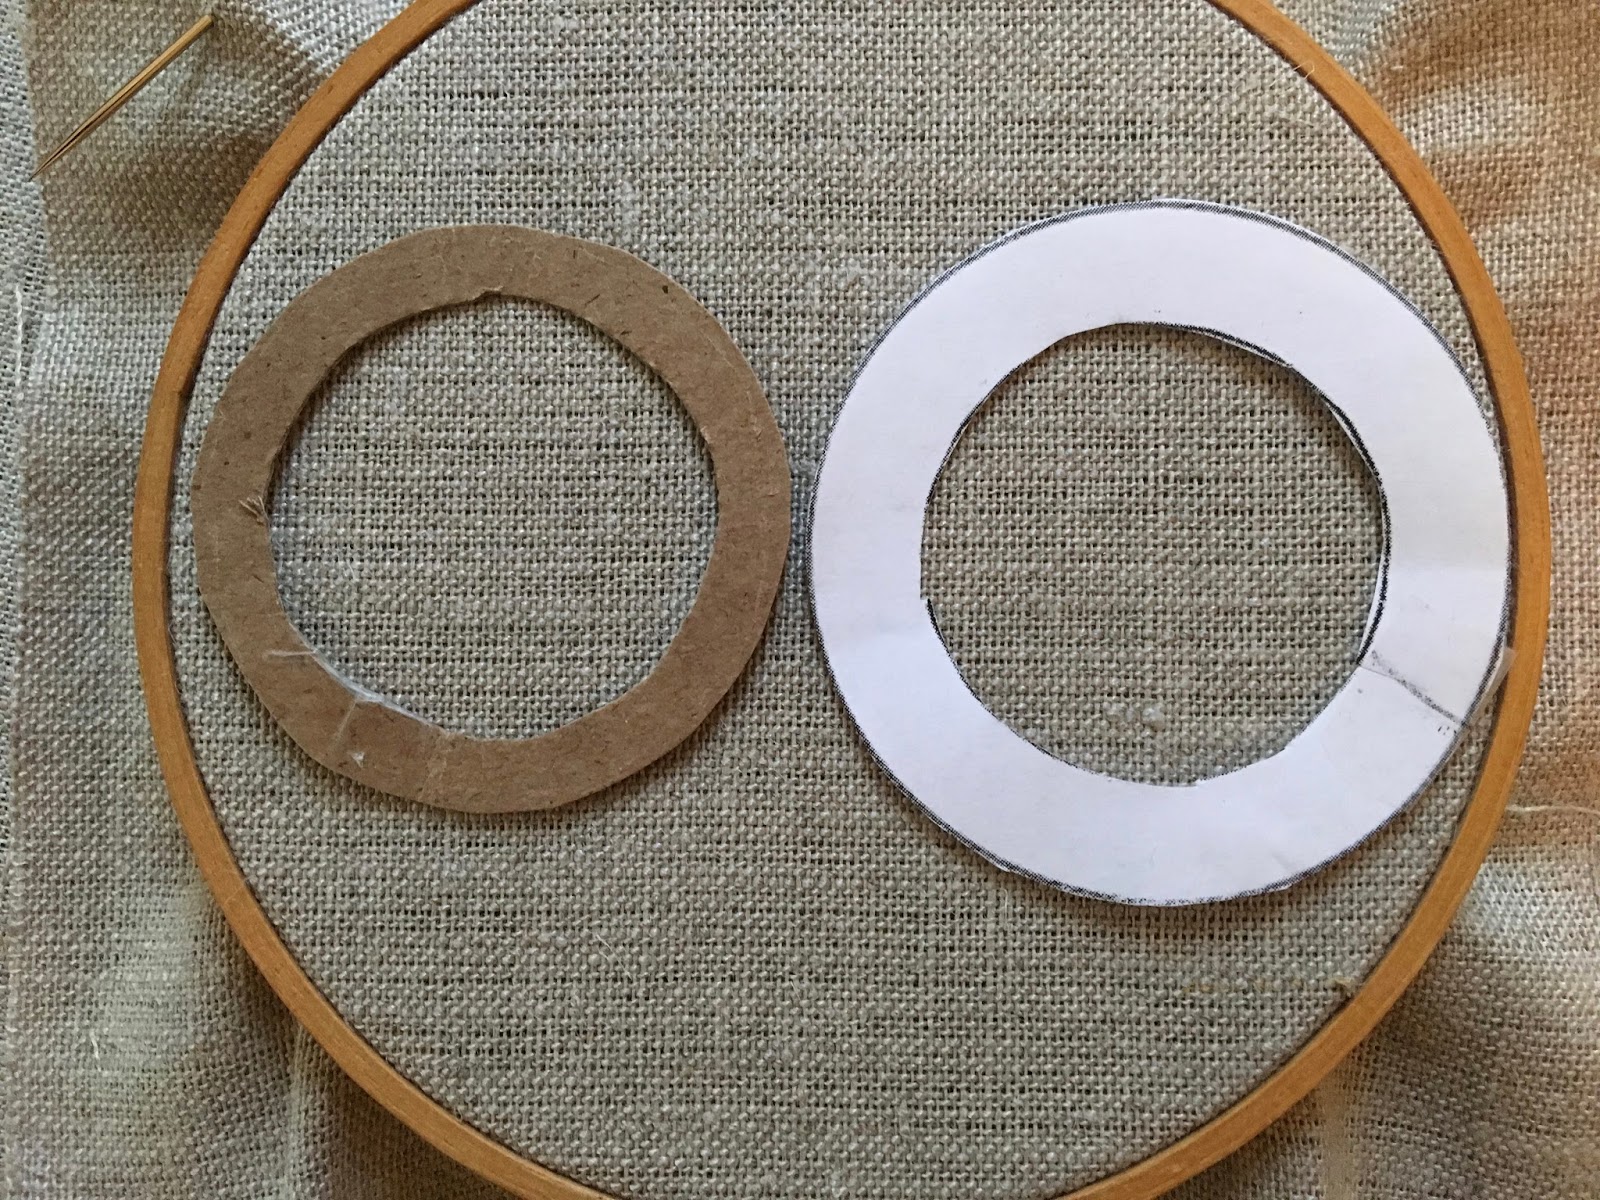
My second attempt, I cut a smaller, thinner circle template.

Below is the first circle in white paper on the right and the new template on the left. 

Plushwork Wreath tutorial by Michelle for Mooshiestitch Monday on Feeling Stitchy

Same process - I stitched three layers of wool.

Plushwork Wreath tutorial by Michelle for Mooshiestitch Monday on Feeling Stitchy

I cut the layers and removed the template. See how there is less of a gap this time??

Plushwork Wreath tutorial by Michelle for Mooshiestitch Monday on Feeling Stitchy

Here it is trimmed and fluffed. You can still see a line around the middle but it's less than the first wreath.

Plushwork Wreath tutorial by Michelle for Mooshiestitch Monday on Feeling Stitchy

Here is the wreath finished with the bow and french knots!

Plushwork Wreath tutorial by Michelle for Mooshiestitch Monday on Feeling Stitchy

Do you like the first or second wreath better? 

I hope you try this plushwork wreath sometime. If you do, leave a comment below and let us know!


No comments:

Post a Comment