Hi all! We have a winner in the Mastered class giveaway!
But first, let's see what your favorite classes were:
Creative Embroidery: 19
Tambour Beading: 7
Goldwork Embroidery: 6
Textile Jewelry: 2
Machine Embroidered Jewelry: 1
Ok, now let's meet our random winner - it is Maggie, and she'll be enrolling in the Machine Embroidered Jewelry class:
• 4 days ago
I am most interested in Machine Embroidered jewelry, because it looks so different than anything I have done before.
If you didn't win, don't forget that you can do a free trial for any Mastered course to check it out before you buy it - a really nice feature.
Also, the lovely people at Mastered have one more surprise for our readers - they are offering a 20% discount on all their courses! Just enter the code STITCHY at checkout.
Thanks again, Mastered, and thanks to all of our readers who entered the giveaway!
Pages
▼
March 31, 2014
March 30, 2014
Patterns: Fresh Produce
Photos by Thimblenest
A trio of seasonal freebies today by the talented Wendy from Thimblenest. They're perfect for shopping bags and I just love the satin stitch lettering, you can find the patterns here.
March 28, 2014
Win a Spot in a Mastered Class!
Hi all! A few weeks ago I did a review of a lovely Creative Embroidery class with Diana Springall on Mastered.
Well, I'm excited to announce that the wonderful people at Mastered would also like to giveaway an embroidery class of your choice to one lucky Feeling Stitchy reader! Choose from the 5 gorgeous classes below, and be sure to click each image to see preview videos and more information:
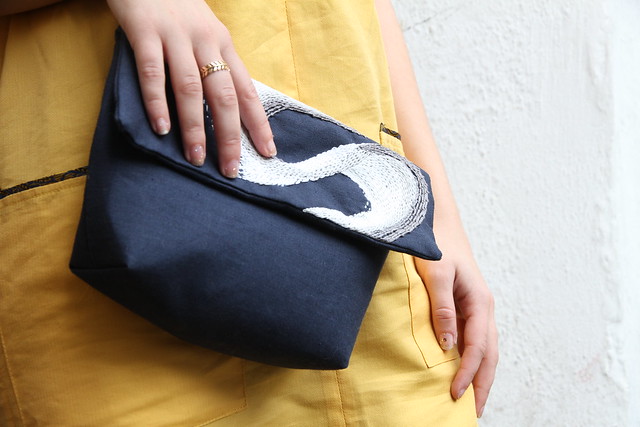
Diana Springall is one of Britain’s leading textile artists and in this course you will discover her unique design process and learn how to devise and stitch your own bespoke creations. The first 100 students to enrol will receive a signed copy of her book: five of those will be selected to take a personal embroidery masterclass with Diana in her UK studio.
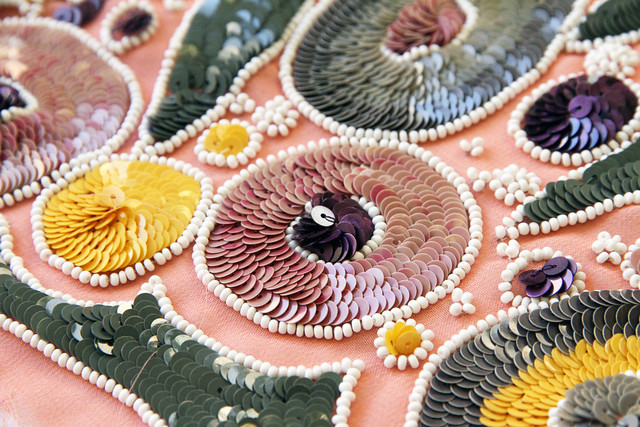
Learn the couture embellishment technique of tambour beading with world-renown experts, Hand and Lock, the company who Louis Vuitton and other fashion houses turn to for their beadwork and embroidery. Director Jessica will choose one student to complete a work placement in summer 2014.
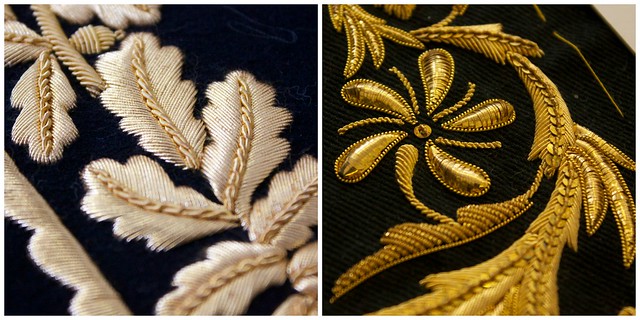
Learn the couture embellishment technique of goldwork with world-renown experts, Hand and Lock. Fashion houses such as Louis Vuitton and royalty from across to the world turn to this 250-year-old company for their expertise in goldwork embroidery.
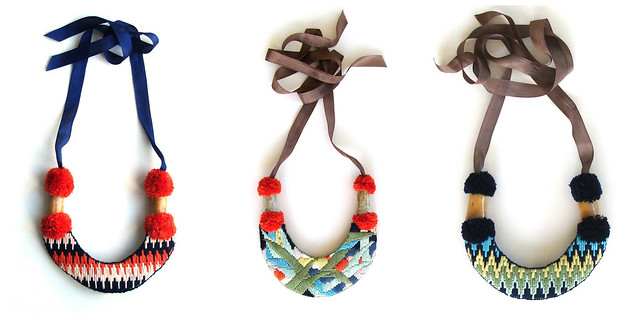
Learn how to create truly unique pieces of textile jewellery by hand-dyeing your own materials and turning that yarn into necklaces, brooches and more. Expert dyer Helen Neale, and jewellery maker Anna Alicia are your instructors.

Learn how to use your sewing machine to design and produce beautiful jewellery with textile artist Gilda Baron. Mollie Makes editor Lara Watson is our current guest tutor and will be personally selecting the best designs to appear in a special Mollie Makes feature later in the year.
To win, simply leave a comment on this post - tell us which of these classes is your favorite, and why. Comments will be open until Sunday, March 30, 9 PM CST, when they will be closed and I will choose 1 random winner. This contest is open to all of our readers!
If you have any problems finding the comments, click this link and scroll down to the bottom:
http://www.feelingstitchy.com/2014/03/win-spot-in-mastered-class.html.
Well, I'm excited to announce that the wonderful people at Mastered would also like to giveaway an embroidery class of your choice to one lucky Feeling Stitchy reader! Choose from the 5 gorgeous classes below, and be sure to click each image to see preview videos and more information:
Creative embroidery with Diana Springall

Diana Springall is one of Britain’s leading textile artists and in this course you will discover her unique design process and learn how to devise and stitch your own bespoke creations. The first 100 students to enrol will receive a signed copy of her book: five of those will be selected to take a personal embroidery masterclass with Diana in her UK studio.
Couture embellishment: tambour beading

Learn the couture embellishment technique of tambour beading with world-renown experts, Hand and Lock, the company who Louis Vuitton and other fashion houses turn to for their beadwork and embroidery. Director Jessica will choose one student to complete a work placement in summer 2014.
Goldwork embroidery: couture embellishment

Learn the couture embellishment technique of goldwork with world-renown experts, Hand and Lock. Fashion houses such as Louis Vuitton and royalty from across to the world turn to this 250-year-old company for their expertise in goldwork embroidery.
Textile jewellery: from raw materials to the final piece

Learn how to create truly unique pieces of textile jewellery by hand-dyeing your own materials and turning that yarn into necklaces, brooches and more. Expert dyer Helen Neale, and jewellery maker Anna Alicia are your instructors.
Machine embroidered jewellery

Learn how to use your sewing machine to design and produce beautiful jewellery with textile artist Gilda Baron. Mollie Makes editor Lara Watson is our current guest tutor and will be personally selecting the best designs to appear in a special Mollie Makes feature later in the year.
To win, simply leave a comment on this post - tell us which of these classes is your favorite, and why. Comments will be open until Sunday, March 30, 9 PM CST, when they will be closed and I will choose 1 random winner. This contest is open to all of our readers!
If you have any problems finding the comments, click this link and scroll down to the bottom:
http://www.feelingstitchy.com/2014/03/win-spot-in-mastered-class.html.
March 27, 2014
Scottish Diaspora Tapestry - Portuguese Panels
Olá! Two weeks ago I introduced you to the Scottish Diaspora Panel and promised to show the panels that were sent to Portugal.
We received two panels designed and drawn onto linen, a colored pattern and wool thread. We should choose our own stitches to bring the design to life. Both designs represent the Porto Wine industry. There is a third panel, depicting Sir John Drummond (John of Scotland, Joao Escorcio) in Madeira in the 15th Century, but it is being stitched in Scotland.
The panels are very different from each other, which happened to be a great way of creating different experiences around them.
There is a panel representing George Sandeman that was sent to the North, the region of Porto wine. The panel has a much more intricate and detailed pattern. The North of Portugal is the region where we find most of Portuguese embroidery traditions...
So we decided to have it embroidered there, in the North, in a more traditional way, using the stitches more common in our regional embroideries.
Méri Almeida from the blog agulhas da méri became responsible for this panel, coordinating a team of volunteers that have been gathering on a daily basis...
Méri was the best choice I could have ever made... She knows all the details of our traditional stitches, she loves to use embroidery technique at a high level, and puts her heart into each stitch. The photos showing the team working tell us that this is the spirit being lived there...
In the North we have the panel of the technique and rigor... But the door is always open and whoever wants to help or see the panel will be welcome.
 |
| George Sandeman's panel |
The panels are very different from each other, which happened to be a great way of creating different experiences around them.
 |
| Port Wine families' panel |
There is a panel representing George Sandeman that was sent to the North, the region of Porto wine. The panel has a much more intricate and detailed pattern. The North of Portugal is the region where we find most of Portuguese embroidery traditions...
So we decided to have it embroidered there, in the North, in a more traditional way, using the stitches more common in our regional embroideries.
Méri Almeida from the blog agulhas da méri became responsible for this panel, coordinating a team of volunteers that have been gathering on a daily basis...
 |
| Lovely details including the mustache using velvet stitch from Guimarães embroidery |
 |
| The hair is growing day by day with incredible "canutilho"stitches (bullion knots), the soul of Guimarães embroidery |
In the North we have the panel of the technique and rigor... But the door is always open and whoever wants to help or see the panel will be welcome.
 |
| The grapes are finished and the first vine leaf is almost done... |
The other panel represents many of the Scottish families related to Porto wine industry and the design is simpler, not giving opportunity for using many different stitches.
And the simplicity of the design was used with mastery by Sofia, from the blog Tayari, a borboleta serrana. Instead of a very technical panel, in Lisbon, we have one in which many participate.
 |
| Using "ponto frouxo" or Castelo Branco Stitch to fill the wine barrel |
And the simplicity of the design was used with mastery by Sofia, from the blog Tayari, a borboleta serrana. Instead of a very technical panel, in Lisbon, we have one in which many participate.
 |
| A group of volunteers, in Lisbon, stitching the outlines using stem stitch. |
For several days Sofia received volunteers in a public space in Lisbon, where they gathered to embroider all the outlines in stem stitch. In a weekend she traveled to Sintra in order to work with another group of volunteers, including a Scottish lady. She was in an Embroidery School, where a teacher of the Castelo Branco embroidery began filling the wine barrel at the centre. And she managed to take the panel to a public school where a group of 10 year old students experienced the joy of embroidering for the first time... Next weekend the panel will travel to a rural region of Portugal and there some very skilled embroiderers will also be able to participate.
.jpg) |
| The panel at the school, where students learned history, geography and embroidery technique |
Sofia is coordinating all these different volunteers and at the same time ensuring the quality of the stitching. The stitches that have been chosen are giving the panel such a textured touch... That's not an easy job and Sofia is coordinating it always with gentle words and a smile on her face...
 |
| One of the four corners of the Port families' panel. |
March 26, 2014
Bunnies! Bunnies! Everywhere!
Bunnies, bunnies everywhere! Bunnies, bunnies, in your hair.Okay, maybe not in your hair but definitely in your stitching. You can purchase this darling pattern from Red Letter Day Stitches...just in time for Easter. Be sure to check out her other patterns on her website.
March 25, 2014
Tutorial Tuesday
Happy Tuesday, everyone!
Today's tutorial was an idea I had when I walked into my sister's office without knocking, and began talking to her before I realized she was on an important phone call. I had to do that apologetic move and bow out until she was finished. I thought a stitched double-sided doorknob hanger would be good, that way my sis could use it to let me know when it was alright for me to barge in, or flip the hanger over if I need to zip my lip. This is a good doorknob hanger for offices and workspaces, but I also thought it might be good to change out the telephone image and use something appropriate for a nursery when the baby is sleeping. Either way, this doorknob hanger can help alert visitors as they approach your door.
To make this doorknob hanger you will need:
-muslin in a 18x18 inch piece (there will be scraps)
-11 inch piece of ribbon
-poly-fil or fiberfill
-embroidery supplies (hoop, floss, scissors, needles)
-sewing machine and coordinating thread
-scissors
-pins
-Telephone embroidery pattern (available at Urban Threads)
I created a pattern of sorts using a free vintage pattern from French-knots.com and incorporated text using a stock font in a Word document. You can access the vintage floral pattern here, but I have also made the floral pattern with text available for you here.
Step 1: Transfer the patterns to fabric. Make sure to place the the patterns far enough away from each other so you can cut 6.5x6.5-inch squares out of fabric with the embroidery at the center. Stitch.
Step 2: Once embroidered, cut two 6.5x6.5-inch squares with the embroidery at the center of each square.
Step 3: Place one square with the right side, face up, and lay the ribbon on top of it with the curved part inward and the edges aligned along the top edge of fabric. The outer edges of the ribbon need to be at least 1-inch away from the side edges of the fabric. Lay the second embroidered square right side down on top of this. Pin in place.
Step 4: Stitch around the exterior of the square with a 1/2-inch seam allowance, leaving one small space at the bottom of the square open, for flipping. I used red so you could see where I sewed this up.
Step 5: Clip the corners and flip, pushing the corners out.
Step 6: Take poly-fil or fiberfill, and stuff the doorknob hanger to your liking. Be careful not to overstuff the hanger, because it can bust out the stitches.
Step 7: Using a ladder stitch, close the space used to flip and stuff the doorknob hanger.
Step 8: Hang on your office or work room door and hope I don't barge in while you are on the phone!
Hope you enjoy this week's tutorial and give it a try!
Today's tutorial was an idea I had when I walked into my sister's office without knocking, and began talking to her before I realized she was on an important phone call. I had to do that apologetic move and bow out until she was finished. I thought a stitched double-sided doorknob hanger would be good, that way my sis could use it to let me know when it was alright for me to barge in, or flip the hanger over if I need to zip my lip. This is a good doorknob hanger for offices and workspaces, but I also thought it might be good to change out the telephone image and use something appropriate for a nursery when the baby is sleeping. Either way, this doorknob hanger can help alert visitors as they approach your door.
-muslin in a 18x18 inch piece (there will be scraps)
-11 inch piece of ribbon
-poly-fil or fiberfill
-embroidery supplies (hoop, floss, scissors, needles)
-sewing machine and coordinating thread
-scissors
-pins
-Telephone embroidery pattern (available at Urban Threads)
I created a pattern of sorts using a free vintage pattern from French-knots.com and incorporated text using a stock font in a Word document. You can access the vintage floral pattern here, but I have also made the floral pattern with text available for you here.
Step 1: Transfer the patterns to fabric. Make sure to place the the patterns far enough away from each other so you can cut 6.5x6.5-inch squares out of fabric with the embroidery at the center. Stitch.
Step 2: Once embroidered, cut two 6.5x6.5-inch squares with the embroidery at the center of each square.
Step 3: Place one square with the right side, face up, and lay the ribbon on top of it with the curved part inward and the edges aligned along the top edge of fabric. The outer edges of the ribbon need to be at least 1-inch away from the side edges of the fabric. Lay the second embroidered square right side down on top of this. Pin in place.
Step 5: Clip the corners and flip, pushing the corners out.
Step 6: Take poly-fil or fiberfill, and stuff the doorknob hanger to your liking. Be careful not to overstuff the hanger, because it can bust out the stitches.
Step 7: Using a ladder stitch, close the space used to flip and stuff the doorknob hanger.
Step 8: Hang on your office or work room door and hope I don't barge in while you are on the phone!
March 23, 2014
Patterns: New Bumpkin Bear!
L to R clockwise - Rabbit's Favourite Outfit, Over The Garden Gate, The Giraffe Ride - by Bumpkin
Just in time for some Easter stitching, there are three new embroidery patterns by Bumpkin! You can check these out, alongside Bumpkin's classic designs here.
March 20, 2014
Welcome Spring
Olá! May Spring inspire our stitching...
These stitches belong to Maria Alice, with fairy hands... And the inspiration came from the beautiful poppy fields of Alentejo.
*next week I'll bring the news from the Portuguese panels of the Scottish Diaspora Tapestry.
March 17, 2014
Kristen's Tutorials on Cut Out And Keep!

Kristin (or as she's known on the internet, Bobby Pin Bandit) is being featured all this week as a Crafty Sewing Superstar on the blog Cut Out and Keep!
Kristin writes the wonderful Tutorial Tuesday series here on Feeling Stitchy, and we're mighty proud of her!
Visit Kristin's tutorials on Cut Out And Keep.
March 16, 2014
Patterns: The Girls
the girls by liz stiglets
Cozyblue has even more patterns out! The left is called Flower Girl and the right is called Home Girl and both can be found in Cozyblue's oh so tempting shop. Both have lots of really nice detail to get into.
March 13, 2014
Scottish Diaspora Tapestry
Olá! This week I bring a beautiful story that comes from Scotland...
Some days ago I received a challenging invitation...
Margaret and her team were looking for people in Portugal to become volunteer stitchers to take part in the Scottish Diaspora Tapestry, a project that celebrates and commemorates Scotland's history in its interaction with communities in countries abroad.
This truly was a surprise for me and a very tempting one... I never doubted that it would be possible to find the volunteers needed to have it done, and of course I accepted the challenge... Next week I will talk about the panels that were sent to Portugal and I'll show you the work in progress... This week I'll try to explain this project that is so worth being shown.
All the panels were designed by Andrew Crummy, then traced by a volunteer team. The kits for each panel were prepared, including the colored design, the linen with the design already drawn on, the wools to be used and Guidelines. And then each kit was sent to specific country. Their individual interpretation is encouraged in the use of stitches and colors, to reflect local traditions.
Some days ago I received a challenging invitation...
Margaret and her team were looking for people in Portugal to become volunteer stitchers to take part in the Scottish Diaspora Tapestry, a project that celebrates and commemorates Scotland's history in its interaction with communities in countries abroad.
She told me there are over 150 panels being stitched in over 25 countries around the world and they would like to include Portugal.
 |
| Presentation panel |
This truly was a surprise for me and a very tempting one... I never doubted that it would be possible to find the volunteers needed to have it done, and of course I accepted the challenge... Next week I will talk about the panels that were sent to Portugal and I'll show you the work in progress... This week I'll try to explain this project that is so worth being shown.
 |
| A panel from India, photo by SDT |
And their words are the best to describe it...
The Scottish Diaspora Tapestry is a community arts project celebrating the Scottish Diaspora through embroidery!
Over the centuries Scots have migrated all over the world and have often had a profound impact on the areas where they settled. This project will see 25 such communities documenting their Scottish connections on a series of embroidered panels. Their combined stories will pay homage to the incredible determination and courage of Scots over the centuries.
Over the centuries Scots have migrated all over the world and have often had a profound impact on the areas where they settled. This project will see 25 such communities documenting their Scottish connections on a series of embroidered panels. Their combined stories will pay homage to the incredible determination and courage of Scots over the centuries.
.jpg) |
| A panel from Hong Kong, photo by SDT |
The Scottish Diaspora Tapestry is to be created by volunteers in communities across the globe. It will be assembled and displayed in Scotland as part of the 2014 Homecoming celebrations.
 |
| A panel from England, photo by SDT |
All the panels were designed by Andrew Crummy, then traced by a volunteer team. The kits for each panel were prepared, including the colored design, the linen with the design already drawn on, the wools to be used and Guidelines. And then each kit was sent to specific country. Their individual interpretation is encouraged in the use of stitches and colors, to reflect local traditions.
After returning to Scotland, the panels will be displayed in the Scottish Parliament in the summer this year, and eventually will travel around Scotland and then to other countries where Scots have settled or traded etc.
This is such an inspiring and generous initiative, that brings out the best in each of us. I believe it is a celebration of our "global village" that was so big in the past and that today seems to fit inside our smaller and smaller screens...
 |
| Panels from Holland, photo by SDT |
This is such an inspiring and generous initiative, that brings out the best in each of us. I believe it is a celebration of our "global village" that was so big in the past and that today seems to fit inside our smaller and smaller screens...
In Portugal, this week we begun a journey between Portugal and Scotland on the tip of a needle! Come with us and share our joy...
March 12, 2014
El Poochador!
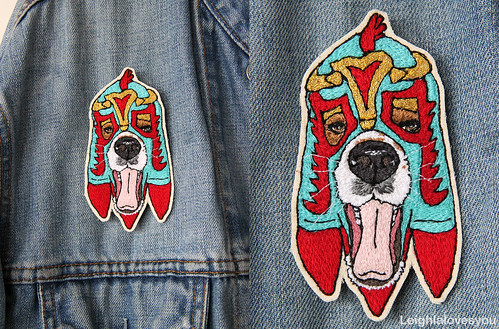
To honor the newest puppy in my household, I give you El Poochador by LeighLa Loves You. Seriously, how can you resist the charismatic charm of El Poochador? I can't do it...I just can't. Check out her other amazing creations on her Tumblr site and in her shop.
March 11, 2014
Tutorial Tuesday
Happy Tuesday, everyone!
There's something I love about the shades of green and shamrocks that St. Patrick's Day brings. I'm in the middle of a move right now, so my St. Patrick's decor is trapped in a box that has been tetris-ed into the most difficult spot to reach. Instead, I made my own mini banner to add some green for the upcoming celebration and I am sharing it with you!
If you recall our tutorial from around this time last year, the shamrock pattern I used then, worked for this banner, as well. All I did was scale the image to fit the entire page in my print options, and it was instantly larger.
To make your own St. Patrick's Day banner, you will need:
-embroidery supplies (hoop, floss, scissors, needles)
-30x20-inch piece of muslin or cotton (there will be leftovers)
-rotary cutter and mat
-60-inches of twine or string
-pinking shears
-sewing machine and supplies (optional)
-craft glue or glue gun (optional)
Step 1: Print the letter and Shamrock patterns. For the Shamrock pattern, my printer gave me the option to scale it to fit the page, if your printer does not have that option, enlarge the pattern 190% and it should work. Transfer your pattern to the fabric, spacing them out 3-inches or more away from each other.
Step 2: Stitch the letters and shamrock with green embroidery floss. I used a split stitch for the letters and a stem stitch for the shamrock, but feel free to experiment with your stitches. I then filled the shamrock with scattered french knots.
Step 3: Using a rotary cutter, trim the stitched fabric into four separate triangles so that each letter and shamrock is on it's own separate pennant. The top of the triangle should measure 5-inches and the length between the top center and bottom point is 8-inches.
Step 4: Using pinking shears, trim just along the sides of each pennant.
Step 5: Turn all the pennants face down and place the twine or string along the top edge. Fold the fabric 1/2 an inch over the twine. Trim the top edges on the side that stick out. This is where you have the option to sew or glue the fold down. I sewed this together, but glue works just as well. Repeat for all pennants.
Step 6: Trim your twine to your length of choice and hang for instant St. Patty's Day festivity.
Hope you enjoy today's tutorial and have a chance to give it a try!
March 9, 2014
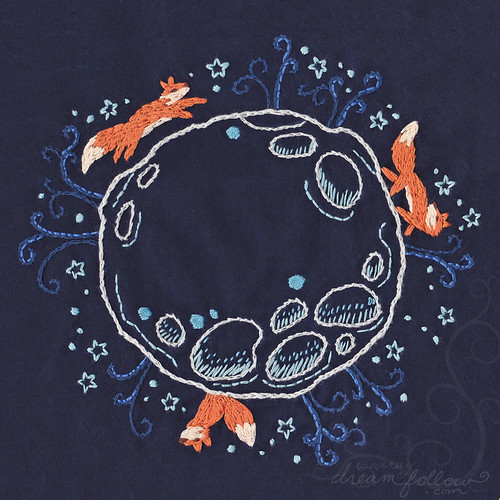
Patterns: Moonlight Forest
Moonlight Forest by Aimee Ray
Aimee Ray has a new pattern out! Called Moonlight Forest, it is accompanied by a great little tutorial on how to fill stitch those foxes on her blog.
March 6, 2014
The embroidery that changed my life
Olá! Nineteen
years ago I had no idea that my life would become intrinsically related to
embroidery. I was a university professor beginning my career and no way I could
think that embroidery would come into my life as it did… But there was a
premonitory sign…
I designed
my wedding dress and at that time I decided I would like it to be hand
embroidered, in a simple way, using color (not only white) and inspired by “Daisies”
– in Portugal, Margarida is used to
name a girl (Margaret) and to name the flower (daisy). Every detail was special
for me. And I wanted it exactly as I imagined, full of meaning…
It was not
an easy choice… Above all it was a lonely choice… My mother would have
preferred to have a richer embroidery. Maybe in gold or silver, or at least in
a brilliant white… Absolutely not in yellow and green!! The owner of the “embroidery
house” was a very respectful lady, heiress of the most famous “Maison de couture” in the North of
Portugal… No way she wanted to have her work related to something that could be
named as “simple”… She showed me so many samples trying to change my mind… But
I wanted daises in yellow and green… As I knew we had to reach a compromise I
decided, in order to make it “richer”, that they could use little beads but
only if they did not shine!! And they could create the pattern… Always
assuring: daisies in yellow and green.
And as it
often happens, compromise took us further. At the end all of us were happy with
the result.
This week,
celebrating 19 years of this special embroidery, I picked the dress to take
some photos. And I felt that it is not out of fashion because it was not meant
to be in fashion but rather to be full of meaning…
And now,
with my older daughter named Margarida
and embroidery “living” in my daily life, I’m sure that my wedding dress was
really full of meaning and that it had foretelling powers…
No doubt... that piece of embroidery
And I would love to know if there is such an important piece of embroidery in your life...
*this post was meant to be published last week...
*this post was meant to be published last week...


.jpg)


