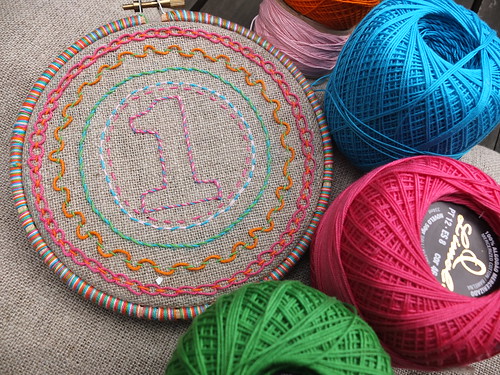
Then I thought... What can be simpler than using running stitch? So I decided to play with running stitch... As I didn't know the colors of her room, I used what I had at home, it was easier, too...
If you like it and want to make something similar you'll see that it's impossible to make something simpler...
 |
| Playing with running stitch, my photo |
I traced five circles using objects I had at home... If it was today I would have done it differently...
Each day I love more and more using tracing paper in embroidery... When the patterns and the stitches are simple or, above all, when the fabric is hard to trace, using tracing paper is perfect!
- So... You can draw your circles in your computer, print them on tracing paper and then embroider the five circles with running stitch through tracing paper and the fabric.
- Each stitch you see in this piece of embroidery is a variation of running stitch...And all variations begin with these straight stitches...
- After embroidering all the circles with running stitch you can remove the paper. Be careful not to pull it all at once, it's better to remove it piece by piece. It will work...
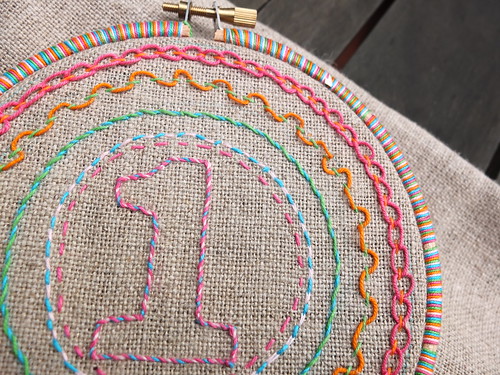
Beginning with the first circle (in the center), these were the stitches I used: 1) running stitch, 2) Holbein stitch, also called double running stitch or reverse running stitch, much used in blackwork, but here I filled the spaces with a different color; 3) whipped running stitch; 4) laced running stitch; 5) double laced running stitch - sometimes called interlaced running stitch. (Do you use different names?)
Actually I began with the last stitch but it's better to begin with the common running stitch so you can practice and have regular stitches, which is very important in double lacing stitch. Beginning with the most difficult stitch was certainly not a wise decision!!
Finally... to embroider the "number one" I tried the double running stitch, but the colors didn't work, so I decided to whip it and I liked the final result. After that, I read that the whipped backstitch is great for lettering and as the final look is so similar I decided that I made the right choice...
As it was going to be a finished work to hang up, I wanted the hoop to have a beautiful look. Recently I've been finishing my hoops by wrapping them with the threads used in my embroidery and I have to say that I'm very proud of that final look...
 |
| Final look with the wrapped hoop, my photo |
Some months ago I was asked about the threads I use... I always use a Portuguese manufacturer, they make a very beautiful no.8 pearl cotton for Guimarães Embroidery. But usually I work with crochet thread no.12 (in this case) and no.6 - yes it's true...
Next week I'll tell you how I use my computer to make embroidery patterns with letters and numbers as I did this time with the "One".
Just to end... this beautiful fabric is also made in Portugal and here we call it "estopa"!!

The whole design is great but I especially *love* what you did with the hoop! Totally gorgeous and an awesome finish to the piece!
ReplyDeleteI think it is just lovely! I love bright colors on a natural linen fabric!
ReplyDeleteI agree- the hoop is awesome!
ReplyDeleteThat is gorgeous! Simple yet so effective :-) happy stitching!
ReplyDeleteLovely. The hoop is a "must have" know!
ReplyDeleteLovely. I must make one of these hoops for me!
ReplyDeletecan you do a tutorial on how to wrap the hoop in thread? i usually paint mine, but this is fab!
ReplyDelete