Pages

July 31, 2012

July Stitch Along

Wow! I can not believe July is over! This month just flew by. A big sloppy wet kiss  to everyone who participated in this month's stitch along.

JulyStitchalong2012 ~ HoneyBearHappiness
Love this take on the honey bears! LaWhimsy rocks!

Feeling Stitchy - July Stitch A Long
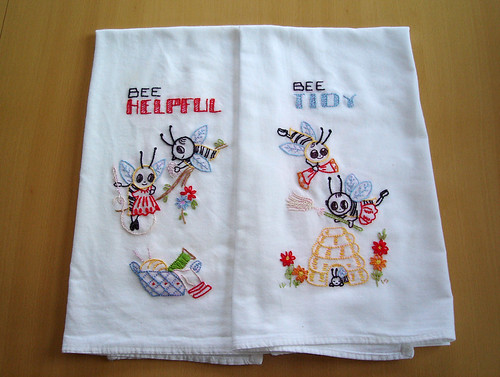
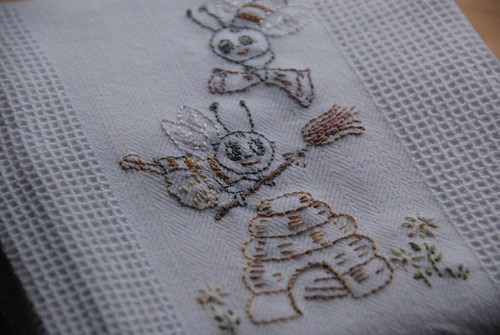
AllThingsBelle did an incredible job on the bee pattern. I love that she used a honeycomb towel to go with the bees.


los Busy Bees
Our very own Floresita decided to get in on the action! The cuteness and colors are killing me.

Thanks again for everyone who stitched along with me! It was ten tons of fun! 


Tutorial Tuesday


Happy Tuesday, everyone! I have a tutorial round-up to share with you today.

If you need some organization in your office, cross-stitched office supplies are a fun way to add some color to your work space. The full tutorial can be found via Camille Styles, here.


Sometimes our shoes need a little extra pick-me-up, and colorful stitches are just the trick. Visit Skunkboy to see how Katie used embroidery to re-style her canvas shoes.


If you are looking to add some variety to your stitches, head over to Purl Bee. They have some great tutorials, including one for a two-color embroidery stitch.


If you want a little more of a challenge for your stitches and want to include some amazing embellishment, try Indian Shisha embroidery via Joyful Abode. This stitch incorporates a small round mirror into the center and can be used to accent almost anything you can think of.


Hope you enjoy and give some of these a try!

July 30, 2012

Handicraft for Girls: Doll Quilt Pt. 4

Hullo! Happy Monday everyone. We are finally on our last pattern for the doll quilt. I am still stitching up Kid #3 and have finished the overhand stitches of the first two pieces.


Here is a more detailed shot of the finished overhand stitches (and yes, the thread color did grow on me and some of you were kind enough to leave a comment about it, thank you!):


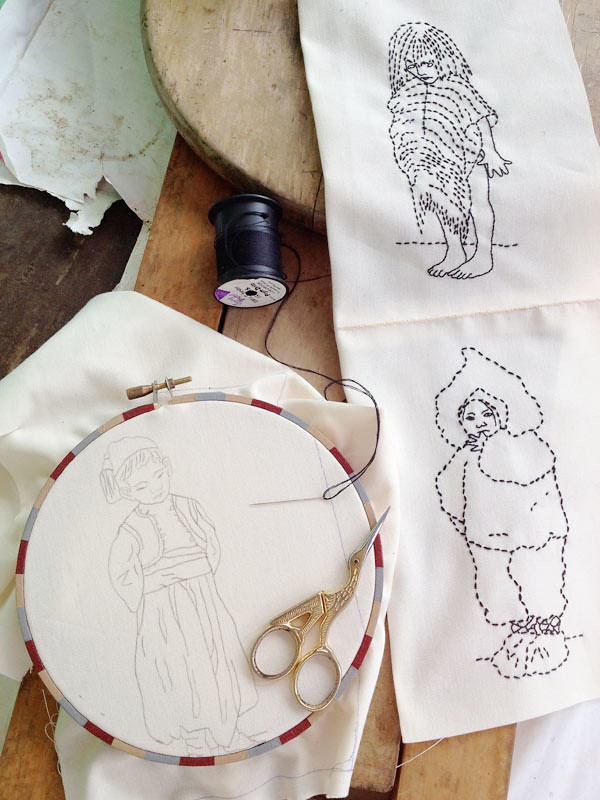
And here I go on the 3rd pattern. To recap, I have veered away from the original instructions by adding backstitches for my details. I will also be adding some satin stitching in the last two patterns to cover solid areas. Like this one has button details that will look better satin stitched I think.


If you are just catching up now, you can find the first 3 patterns here: Part 1, Part 2, Part 3 and the joining with the Overhand stitch.


Thank you to those that replied with great embroidery and traveling tips on the last post! Enjoy your week everyone and happy stitching!

July 28, 2012

New Embroidery with Vintage Patterns - June/July Contest Round-Up

Hi, everyone!  Just stopping by for my monthly round-up post for the New Embroidery with Vintage Patterns group on Flickr.  This month my post is extra special (at least to me!) because NEwVP hosted a contest with tons of terrific prizes!  The contest ran from June 20 - July 20.

There were 3 different categories a stitcher could enter.  I invite y'all to take a peek in the contest photo galleries:  (1) modified pattern, (2) one pattern, many stitchers, and (3) summer theme.

I know the judges had such a difficult time choosing just 1 winner from each of the 3 categories. There are some seriously talented stitchers out there in Flickr-land!

The judges (Brooke from Colonial Patterns, Vicki from PatternBee, and Emily from The Floss Box) have selected the following category winners:

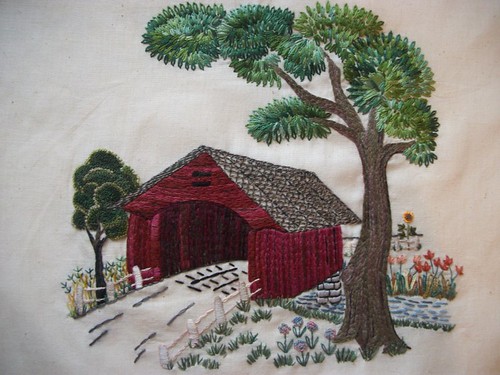
"covered bridge" by sugarglider500 from the summer theme category
Summer Theme Catagory--Covered Bridge


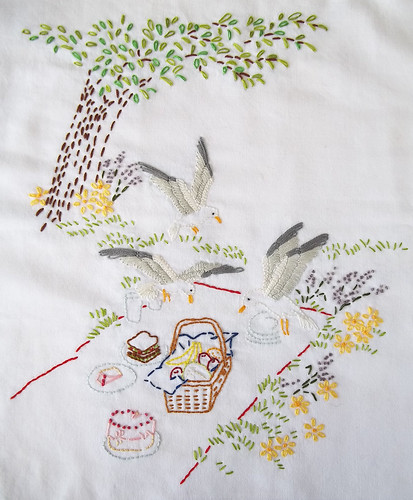
"this picnic is ruined!" by mnethia from the modified pattern category
this picnic is ruined! : modified pattern


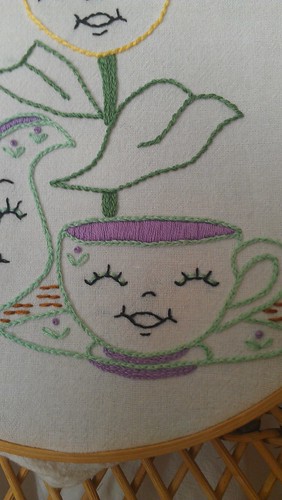
"make tea not war" by one plaid aunt from the one pattern, many stitchers category
One Pattern, Many Stitchers - Make Tea, Not War - Flour Sack Towel


From these 3 category winners, 1 grand prize winner will be chosen.  And although the online poll to choose the grand prize winner was created on Wednesday, July 25, there is still time for you to cast your vote for the grand prize winner so please CLICK HERE to vote.  The online poll will be closed sometime between 3pm - 5pm EST on Sunday, July 29.  The grand prize winner (and 8 door prize winners!) will be announced in the NEwVP group on Monday, July 30.... so definitely stop by our group to hear all the news! 


Here are some "summer of vintage stitchy love" contest photos that show fantastic close-up stitchy details:

From Mom Walds Place
Sweetheart Owl Embroidery Detail


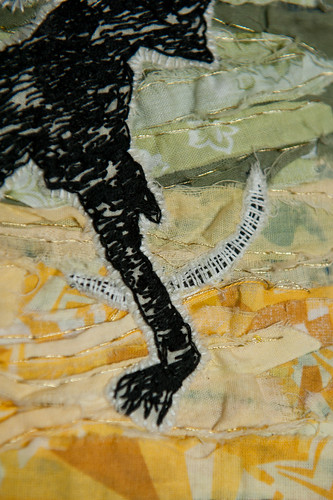
From funkembroidery
moon detail


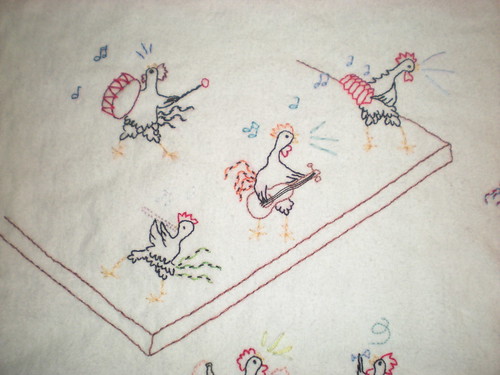
from weekers99
modified pattern - chicken bar scene detail 3


from ThimbleNest
laundry on the line :: modified pattern


from anyakase1
One pattern, many stitchers: SUMMER OF VINTAGE STITCHY LOVE CONTEST


from ~PixieFey~
One Pattern, Many Stitchers 2


from xperimentl
Summer of Vintage Stitchy Love "Summer Theme"


from annepoptart
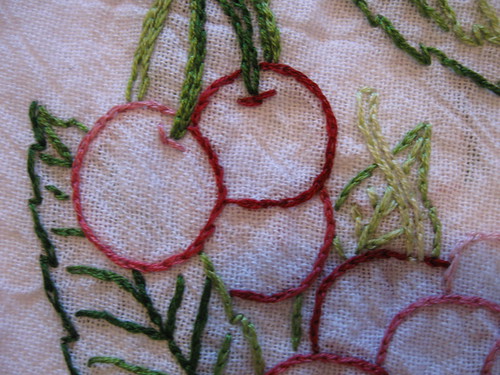
"summer theme" basket of cherries close-up


from stitchin'kat
Close-up of Patch


Thanks again to all who joined our group to either participate or just watch the contest festivities -- we had nearly 150 new members join!  I invite everyone to join our NEwVP group as all the details for the August Stitch along have been posted!  Of course, any photos of new embroidery with vintage patterns are welcome to be shared at anytime!  Keep an eye out for my next "round-up" post on Saturday, August 25.  This upcoming Feeling Stitchy post will feature our NEwVP August stitch-along.  I'm going to try a different format and provide different kinds of information so I hope y'all will like it!  Happy stitching everyone!

July 27, 2012

Book Review: New Crewel: The Motif Collection by Katherine Shaughnessy

Today's book review is the latest addition to the world of contemporary wool embroidery by the author of The New Crewel:

New Crewel: The Motif Collection by Katherine Shaughnessy


The first book, The New Crewel, was a breath of fresh air into the slightly musty wooliness that traditional crewel tends to exude. Not that Jacobean embroidery isn't beautiful (it is), nor that it hasn't been done in more contemporary looks (it has), but there's been little outside the box. In her first book, Katherine took it outside of the box by, well, putting it into ones - lots of little square samplers with a wonderful retro 60s feel to the designs and colours.

The Motif Collection goes along a similar vein, although here she's moved from boxes to circles. These patterns, inspired by nature and her kids drawings, are arranged around and displayed within circles. Like the first book, they're relatively modest in size - something appealing for beginners or stitchers who are after a quick finish. However they are also versatile and expandable, as the book goes on to show in the Projects section.


The first few motifs could have been straight from my scribble book when I was a kid as they seem created with a Spirograph. In the Projects section, these patterns have been displayed as china plates and are surprisingly convincing. The rest of the motifs range from the straightforward to the whimsical, many belonging to the family of "patterns radiating from a central point" but an equal number that could be expanded into any shape you choose.

The Projects section in any book is where, as they say on Cribs, the magic happens - where we can see exactly how these individual motifs could look when put to work. And Katherine doesn't disappoint: from a cute embellished linen skirt to the crewel cilia pillows that look like they could have come from any top designer boutique. I would have liked to see a few more finished pieces, but that's because I'm all about the eye candy.


The final section of the book has the motif patterns printed in full colour, but also includes a CD containing all the motifs as .jpgs, so you can resize, mix around and alter the patterns to be exactly what you are after.


The primary disappointment to me was that we weren't introduced to a new range of stitches. Admittedly, the basic stitches are the ones you need to have to be able to stitch anything at all, but The Motif Collection includes only three more than The New Crewel. All are well described and illustrated, but this book is more about the motifs than the techniques. But this is, of course, not really a problem after all!

All-in-all it's a fun book of small contemporary embroidery patterns, all of which are fairly quick finishes that could be stitched in wool, silk or cotton. If you're deciding between the first or second book, I'd personally lean more to the first (although that may say more about my colour tastes than anything else), but if you enjoyed the first, then this is a very reasonable addition to your pattern book collection.

Rating: 3 1/2 gold needles (make sure it's one with a long eye - wool's pretty thick!)

Starburst hoops

Stitched by PhDstressrelief

I just stumbled on these beautiful starburst hoops by Sara, and they are gorgeous. I love how a simple idea can be executed so wonderfully. Just one of many lovely things available in Sara's shop.


Stitched by PhDstressrelief

Loveliness, Sara!

July 26, 2012

Learning how to embroider...

Olá! In the past few weeks we've been traveling around Portugal following the inspirations and History of regional embroiderers... But this week and the next, I decided to take a small break! Yes, I'll be talking about embroiderers, too and these are very special to me...

Two years ago I created the project "agulha não pica". My intention was to make embroidery kits for kids and grown-up beginners. As I learned how to embroider by myself I wanted to promote that same idea... But as time went by, I received many requests to organize workshops. The idea of bringing together groups sharing the desire to learn how to embroider and to recreate the spirit that has been present in all embroidery History was a challenge. So I decided to launch the agulha não pica club and promote beginner (and other) workshops.

The patterns used during the workshops
Trying to remain faithful to my initial convictions, I decided that no one could belong to the club without making a piece of embroidery by herself... The participants work on a Portuguese traditional heart in the workshop, during 3 hours, learning five different basic stitches. They take home a sampler designed by me and they are asked to recall what they've learned and to embroider the sampler using those stitches. Only after the heart and the sampler are finished do they officially become members of the agulha não pica club!!

I'm happy with this workshop's "format". It proved to have good results!!

The homework for the new embroiderers - my design
It's so great to see all the hearts already embroidered and the samplers, and although they are working from the same patterns, they all seem so different from one another... Creativity has incredible results!

I leave you with some of the hearts and samplers that the new embroiderers have sent me...

Maria Joao

Andreia

Isabel
Cláudia
Margarida
Dora
Clara
Filomena
Clara
Luísa
I'm so grateful to all of them and to the others that don't have their works published too... Obrigada!!
Next week, I'll show you how they managed when they were on their own!! Believe me you'll like it!

Now... For our Portuguese lesson... I'm feeling so proud... I would have to say: "Sinto-me tão orgulhosa"!!

July 25, 2012

Way Back Wednesday

Sometimes it's not necessarily the time the pattern was created that makes the stitching feel vintage. Such is the case of Bascom's puppy piece- it's just the feel of the stitches against the fabric. The style in which it was created, the charm that makes it Way Back Wednesday worthy.

Little Dog

His cowboy embroidery is breathtaking. I feel like I could dive right in. I want to be a part of the world he stitched.
Cowboy

Check out Bascom's other pieces and fall into a world of texture, beautiful redwork and nostalgia. You will not be disappointed.

July 23, 2012

Traveling, Embroidery and Overhand Stitches

Hullo! Sorry, I have been missing from my Monday posts lately. Every other month, my job entails me to work on-site and I have to travel to another island. This latest trip has lead me to find a solution in my problem of being able to submit posts while on the go.

But before getting into that, here is my version of the overhand stitch used to connect the embroidery pieces together of our doll quilt. I began by ironing the quarter-inch fold of both pieces to be joined (arranged as in the reference quilt image in Part 1). In the book, it mentioned to do this on the long side of the piece, but since I have not finished that piece yet, I will be showing you my sample from the shorter side of the two finished ones.

In the description from Chestofbooks.com, it said to baste the stitches together. Since I was working on a short side, I skipped this part and started the stitch as illustrated in the site.

Now, I learned along the way that it states to pick up a few threads only with your needle, so I found I seemed to have placed the stitch too deep and this is more what it means:

I then proceeded to make the overhand stitch. Since you are picking up surface threads, I found it easier to let the thread tail that was set up in the beggining stick out while stitching to make sure it is encased in the overhand stitch (oh I really hope I am making sense here! Let me know if this is confusing you!). One tip said to let the needle face the chest with every stitch and I will add that the thimble came in handy since my fabric was a bit thick.

This is what it looks like after a few stitches (and what it will look like the whole way thru). The thing to remember is that there are no knots to be made. There are many different ways given to start a fresh thread. I plan on just doing the same thing as the start and just make sure that they all get encased in the stitches.

In hindsight, maybe I should have used a closer matched thread to my fabric. But it is slowly growing on me, and I might just stick to it. What do you suggest? It seems such an interesting stitch choice to connect the pieces together, as it is very visible. Maybe because it is a project for the girls to practice the stitches in the chapter? I can only wonder :-)

And now I want to share my other problem that needed a solution.

Most of my family's time is spent on the road, as our job requires it. Thankfully, hubby and I work on the same projects and our sons are not yet in school. This has not hindered me from continuing my creative life and I always set aside time for it, wherever we are.

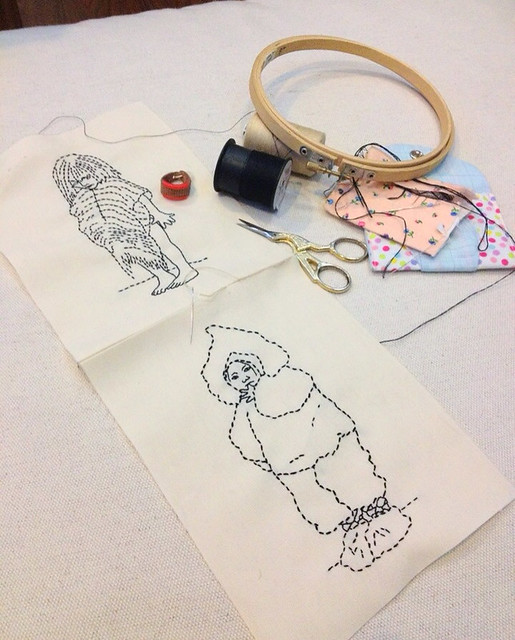
Of all the different creative outlets I am into, it is embroidery that is closest to my heart. One of the reasons is that it is easy to bring along without taking up space in my traveling bag :-). When on a trip, I usually bring along the latest project, an embroidery hoop, threads (only in the colors I am working on), needles (tucked in a little handmade wallet), embroidery scissors and a thimble.

This little kit can already provide a little "me" time and quench creative thirst on the road. The satisfaction in embroidering something, in starting a fresh threaded needle and making that knot when it runs out is all together a calming rhythm amidst the bustle. The anticipation of another pattern to sew once one is done is something to look forward to in the midst of filing reports and making presentations. And these little embroidery projects from public domain ebooks have given me a myriad of things to look forward to.

The Monday post spot in this blog means a lot to me, and I had to find a way to solve the posting problem while traveling. Since I cannot bring much stuff, my computer and big camera have to stay at home. Thus, I solely have to rely on the Ipad and Iphone. I researched on the best apps to use, but none seemed to be the replacement I was looking for. Finally today, I settled on Blogsy for posts, Filterstorm for resizing and other photo lighting corrections and the Iphone to snap the pics. This is by no means an ad! But I just wanted to share this for those of us who blog and travel.

This is my first posts using all these together and still on another trip. I do look forward to next Monday knowing that I can now truly be creative and share from wherever I am.

Happy Monday everyone and do share if you have suggestions and tips for the traveling embroidery blogger!

 

July 22, 2012

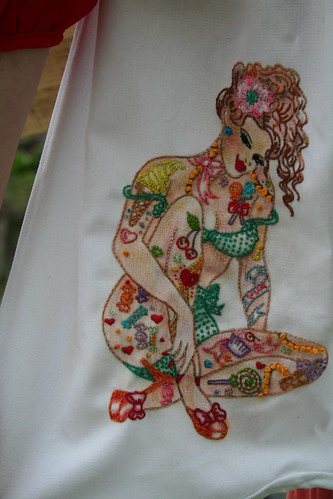
Patterns: Two Candy Girls

Candy, embroidered and colored in by Maureen


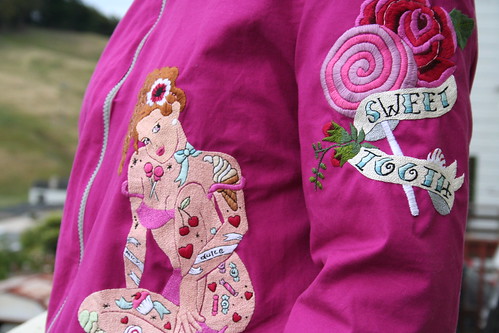
Candy Jacket side view

Candy Jacket Side view (hand embroidery and jacket by Shane York)

I love seeing how the same pattern can be interpreted differently, in this case it's from Sew Lovely's  Tattooed Ladies pattern sheet. I think both are absolutely brilliant and it's always great to see embroidery on clothing!