May 30, 2007
Crafty Blog School: Name Your Blog & Create a Header
Welcome to week 3 of Crafty Blog School! Today we'll talk about naming your blog and creating a header.
Name Your Blog
Choose a name that describes you and your interests, or an unusual phrase that will stick in people's heads. My suggestion? Pick a humorous name! We all remember when something makes us laugh, even if it's a cheesy joke, like ahem, "Feeling Stitchy." :) Last step in naming your blog: Google it! Stay away from any names associated with companies, or names that are already taken by other blogs. Your blog deserves the chance to be unique and completely different! :)
Add Your Own Header
Maybe you think your drawing or design skills are not great or you're not the best at choosing typefaces or colors. Don't worry about it! Remember what I said in the last post about keeping it simple? That also applies to headers! Pick a favorite color and a font you like to create a very elegant design like Claudia's header.
Create a Header in 6 Easy Steps with Clipart
You can do it! All you need to make a header of your own is 1 clipart image and Photoshop. Rebekah of Sweet Bee volunteered for a blog header re-design, and here's how I tackled her banner in 6 easy steps:
1. Inspiration: Keeping in mind that her blog name is "Sweet Bee", I opened up Microsoft Word and found this cute clipart image of a bee:
2. Create a New Image: Find out how wide your header should be, open up Photoshop and create a new image. I created a new image 660 pixels wide and 200 pixels tall and inserted the cute bee:
3. Choose a Font: It can be a simple font or a fun font, just make sure it's readable! I chose a fun font that looked playful, and well, sweet:
4. Choose a Font Color: Use one of the main colors in your clipart image as the font color. The cute bee has light blue, yellow, and orange accents so I tried all 3 but liked the orange best:
5. Add the Subtitle: Use a smaller font of your choice - I suggest Trebuchet and Arial since they are both easy to read in very small sizes:
6. Add a Finishing Touch: I used the paintbrush and made a light blue dotted line as a little "path" for the bee, and presto, we're done!
Jpeg vs. Gif: Important Note About File Size!
Ever visit a blog with a huge, beautiful, color header that never, ever loads? You may think it's your connection that sucks (and this might be the case) but what you're really seeing is a header in need of a weight loss program! The image is too big to load quickly!
Always try saving your headers as Gif files - smaller files that load very quickly. Look at these 2 headers - the first is a Gif and the second is a Jpeg - see any difference? But notice how the Gif file is 1/3 the size of the Jpeg! So whenever you can, use Gif!
Gif file: 19 KB
Jpeg file: 59 KB
Uploading Your Header
Blogger: Uploading your header is very easy - find directions here.
Wordpress: Go to "Presentation" and "Custom Image Header" to find the exact dimensions of your header and upload it. Remember you must use the exact dimensions for Wordpress - Wordpress will re-size your images but the quality of the re-sized image is not good.
Was this Crafty Blog School helpful? I hope I inspired you to create a new header! As always, leave a comment with any questions or suggestions.
Next Week: Blogging Photos From Flickr
All The Crafty Blog School Posts:
week 1: Where Do I Blog?
week 2: Choosing a Template
week 3: Name Your Blog & Create a Header
week 4: Blogging Photos from Flickr
week 5: How to Put that Darned Thimble Guy in Your Sidebar
week 6: How to Take Better Pictures of Your Crafts
week 7: Getting Noticed
Hi, I'm floresita, editor of Feeling Stitchy. I'm an avid stitcher, knitter, and crafter. You can see more of my stitching on Instagram and my blog. My vintage transfer collection is on Vintage Transfer Finds.
Feel free to email me with any ideas for the blog!
May 28, 2007
Interview with a Stitcher
Many of us have seen this photo that accompanies the letters, cbcyr. She belongs to the Flickr Embroidery Group and many people are raving about her work. I was lucky enough to steal some of her time and ask a few questions about her embroidery and her life. This is an interview with Carol.
Q. Carol, how long have you been embroidering and how did you get started?
-
A. I did some embroidery and needlepoint as a kid , my mom was my teacher of all things crafty. I just started embroidering again a few years ago.
-
Q. I think I first noticed your work on flickr where I saw a quilt you made with embroidered horses. I thought it was great and your work helped inspire me to try embroidery. What or who, would you say, have influenced you in crafting?
-
A. Ugh, Those horses! Let me warn people about making embroidered quilts for twin birthdays with a short deadline….. DON‘T DO IT! I am influenced by so many people, books, pictures, blogs, etc. as far as crafting goes. All of the information sits in my head and occasionally something will hatch. I have far more ideas (and fabric) than I will ever have time to finish in my lifetime.
-
Q. Are you most attracted to any particular style of embroidery?
-
A. I found Jenny Hart from Sublime Stitching on Craftster a few years ago and was immediately drawn to her style because I am not really a “ducks wearing bonnets” kind of girl either. Shortly after finding Sublime Stitching I found what is probably as close to heaven-on-earth as I can imagine….. Patternbee.com . Vicki from turkeyfeathers does a great job restoring vintage embroidery patterns. Vintage patterns are my true love and give me a serious case of warm-fuzzies. Really, I could go on all day.
-
Q. So you are a busy mom and work as well, right? Do you have any tricks for balancing all your roles and finding time to stitch?
-
A. Yes, I have a husband, 3 busy daughters and I work as an office manager at a super-cool advertising agency. I’m also the one that always volunteers for everything without ever thinking it out first. You need me to sew 20 costumes by next week, bake 6 dozen cookies, drive your kid to the game and do the walkathon? Sure, I’ll do it, no problem. They I cry and whine on my blog about how busy and stupid I am!
I think my trick is that I sleep 6 hours a night and my house is a mess most days.
Some seasons are better than others for crafting I think, I haven‘t quite mastered spring crafting. For the rest of the year I like to have various projects going on at all times. I always have a tea towel on the hoop near the couch for TV watching and I really enjoy doing embroidery poolside while my kids are swimming, my hands are never idle.
-
Q. What other interests do you have besides crafting?
-
A. Pretty much whatever my kids are doing, I really love watching them play sports. I love to cook. I enjoy spending time with my friends and family. My husband and I are active in our kid’s school and our church.
-
Q. Do you plan your embroidery projects or do you just wait for inspiration to come to you and just go for it? How does the creative process work for you?
-
A. Lately it’s been an idea for a gift that I need the next day and I stitch like a lunatic to get it done. Most times I just stitch whatever I feel like but I prefer to be on a mission.
-
Q. What would your perfect day be like, what would you do?
-
A. It would be all about ME! No cooking, cleaning, driving, no making decisions. I would sew in my pajamas and drink coffee. Just for one day, that’s all.
-
Q. What advice would you give to those interested in learning to embroider?
-
A. Buy lots of DMC floss when it goes on sale. There are no rules, just do it. People tend to get hung up on rules when crafting and that just annoys me. Of course there are general rules that keep projects from falling apart but as far as stitch length and size, neatness of the back of your work etc. We are not performing surgery, just have fun and do what looks good to you. Start small, nothing feels better than finishing a project fast.
____________________________________________________________________
Here are just a few of Carol's embroidery projects.
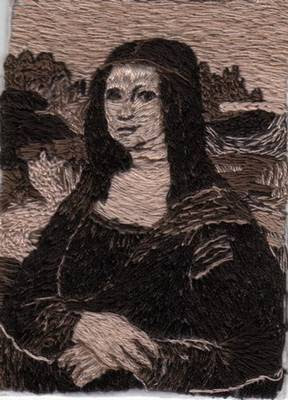
I am quite proud of this little piece. I joined a challenge on Craftster a few years back where we had to use only 3 colors of floss from the same family and create whatever we wanted. This was unlike anything I have ever done. It later became a patch on a tote bag for an art teacher at school.
I put a lot of time into the embroidery on this quilt, it was when I first started up again so I was very careful with my stitches on every piece.
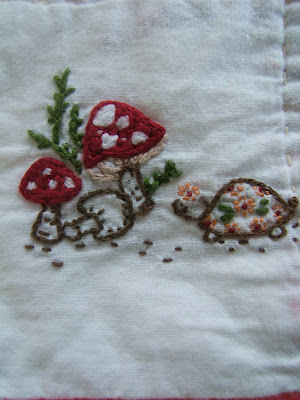
This is just such a cute vintage pattern that I loved doing and is one of my favorites:
-
To see more of Carol's work visit her blog, wip, and view her photos at Flickr.
May 23, 2007
Crafty Blog School: Choosing a Template
Welcome to Week 2 of Crafty Blog School! I'm assuming everyone has chosen a blog service they're happy with. Well, your first challenge when you start a new blog is... choosing a template!
Or, you blogging veterans may have a template already, but you're not 100% sure you love it, or you feel guilty you haven't customized your blog with oodles of fonts, colors, or shiny animated gifs...
Less is More!
May I make a suggestion? Less really is more! I know you have lots of ideas, maybe for background colors, a cool header, a really cool font (or, like 10 different fonts), but when you're starting out, choose a template that's minimal. This way, if you want to customize it, it's much easier without having to figure out where all the pictures are "hidden" in the code. Also, if you have a crafty blog, do you really want the focus to be on 10 different cool fonts, a crazy background pattern that gives you a headache, funky animated pictures, or... your crafts? :)
Here are some nice Blogger and Wordpress templates you can easily customize:
Blogger templates
Minima
Washed Denim
Stretch Denim Light
Blix
Regulus
Pool
Typepad templates?
I'll leave the volunteering to all of you Typepad users! Leave a comment with your favorite template, or one that you'd recommend for a beginner...
A Note on "Minima" Blogs
That Blogger Minima template doesn't look like much, does it? Nothing's moving, there are no dancing or sparkling gifs, but the design is clean and the focus is where it should be: on the pictures of the crafts! My favorite Blogger blogs almost always use the Minima template. It may look plain, but adding your own header and changing the link colors can make a big difference. Take a look at this list and see if it inspires you to go Minima:
anna maria horner
geninne
crafty synergy
sugarloop
Next week: Naming Your Blog and Creating a Header... Leave a comment with any questions or suggestions!
All The Crafty Blog School Posts:
week 1: Where Do I Blog?
week 2: Choosing a Template
week 3: Name Your Blog & Create a Header
week 4: Blogging Photos from Flickr
week 5: How to Put that Darned Thimble Guy in Your Sidebar
week 6: How to Take Better Pictures of Your Crafts
week 7: Getting Noticed
Hi, I'm floresita, editor of Feeling Stitchy. I'm an avid stitcher, knitter, and crafter. You can see more of my stitching on Instagram and my blog. My vintage transfer collection is on Vintage Transfer Finds.
Feel free to email me with any ideas for the blog!
May 22, 2007
Technique: Blackwork
The portrait painter Hans Holbein the Younger became court painter to Henry VIII, and he painted Henry's queens wearing clothes richly decorated with Blackwork. The double-running stitch employed in Blackwork is often called Holbein stitch.
While most often associated with England, blackwork embroidery can be found in other parts of Europe as well.
During its most popular period of usage, three distinct styles of blackwork emerge, all of which co-existed together.
Linear, Reversible Blackwork
- This is the type of work that most people associate with blackwork. It is a usually a counted thread design (though this is not always the case), which is reversible, that is, it looks the same from the front and the back. This style tends to be linear in nature and was mostly used on collars and cuffs of clothing.
- It's popularity can be attested to by the fact that some form of blackwork can be seen in just about every surviving Tudor and Elizabethan portrait. One painter, Hans Holbein, detailed it so well that the stitch used to make this style of blackwork took on his name - Holbein Stitch. This type of blackwork can be done in either double running or back stitch.
- This is second most popular form of blackwork. This type of blackwork consists of free form shapes, (most popularly, flowers and leaves) that are then filled in with repeating geometric fill patterns. This type of blackwork was used extensively in the production of pillow covers and various forms of clothing, such as large sleeves, coifs, nightcaps, smocks and skirt foreparts.
- The first is the use of scattered, individual motifs on items such as pillow beeres (cases) and other bed linens. These are usually done using stem or chain stitch.
- The other form is a repetitive strapwork pattern, again done in stem stitch or chain stitch. Examples can be seen in the portraits of Henry VIII (shirts) and in skirt foreparts.
- The final form is free form motifs with speckling stitch used to add shading to the motif. This is the last form of 16th Century blackwork to develop.
Examples of Historical Blackwork
Patterns
There are many great free patterns for blackwork available on the web:
May 21, 2007
Featured Book: The New Crewel
Artist Katherine Shaughnessy has introduced modern design to the traditional world of crewel in her book, The New Crewel: Exquisite Designs in Contemporary Embroidery.
Katherine hopes "to honor the old and celebrate the new, weaving the traditional crewelwork methods and materials of the past with the modern sensibilities and design elements of today." She has done just that; this book is filled with beautiful designs that reflect a new generation of stitchers who enjoy tradition but want a fresh approach. The New Crewel introduces the reader to crewel, the history of this form of stitchery, and then the basics of construction. And one of the basic questions posed is, "What is crewel?" Katherine explains that crewelwork is the art of embroidery using wool thread stitched on linen fabric.
The New Crewel is designed for stitchers of all levels. The basics of embroidery that include: materials, tools, techniques, and a variety of stitches are all addressed and provide the basis for completing any of the thirty designs supplied in the book. Project ideas are also featured from crewel greeting cards to an eyelet hole lampshade. The rich texture of the wools, the beautiful linen fabric, and the clean design make an inspirational palette that any stitcher could enjoy. Thumbs Up!
...And here are some flickr members that have been enjoying the book, Amanda, Wendy, and me!
May 19, 2007
Preventing a tangled mess
Find the end of the floss and pull out a piece (all 6 strands together) about 15" to 18" long and cut.
Separate the threads a bit at the end so that you see the individual threads. She does this by flicking her finger back and forth right at the end.
Grab one of the strands and pull slowly. Keep a good grip on the other 5 strands, but not too tight.
Repeat for each additional strand needed for your project.
If you need 2 strands remove 2 and rejoin them for threading your needle.
Here she does it "her" way of pulling one strand out so fast that the other strands spin. Note she's got a good grip on the end. If you let go you will have one big tangled mess.
Pulling out single threads prevents the strands from twisting as much while stitching.
I wonder what Katie will teach us next week?
May 18, 2007
A drink by the embroidery pool
May 17, 2007
Crafty Blog School!
Are you wondering how to have a crafty blog of your own? Or maybe you have a blog, but you're bored with the layout, wish you knew how to make a header, or wish your pictures looked a little better. Let's face it, we're not all crafty mamas with amazing graphic design skills or fabric designers with mouth watering photos. But, we've got our crafts, our things we do, and we want to share it with others. Welcome to Crafty Blog School!
Crafty Blog School is a series of posts on how to start a crafty blog of your own, add pictures to your blog, set up blogging from Flickr, create a header, choose a template, etc. Also, I'll do a post on how to take better pictures of your crafts! So, let's get started with the basics, and that is how to start a blog of your own...
Where do I blog ?
You can blog just about anywhere these days. But these 3 blog sites top my list because they're easy to use, customize, and integrate with Flickr:
Blogger (free)
Wordpress (free)
Typepad (paid)
Paid vs. Free Services
Typepad has a lot of nice templates to choose from, and many crafty people use it. But I think free services like Blogger or Wordpress are perfect for beginners - they're great to get your feet wet. After you know what you like you can switch to a paid service. All my blogs (including this one) are hosted on Blogger and I still see no reason to switch to a paid service. There may be other perks, but for me it's hard to argue with free!
What's the Difference?
Do Blogger blogs, Wordpress blogs, or Typepad blogs look different? Well, you be the judge! Here's a list of sample blogs arranged by blog service:
Blogger blogs:
kup, kup land
freehand sketching
paper flower girl
Wordpress Blogs:
losabia
craft daisy
lorelei
Typepad blogs:
this vintage chica
buttons magee
gooseflesh
Remember that no matter what service you choose, you can edit your template to look however you want. But if you have no interest in learning HTML or CSS, choose a service with templates you love so you won't have to mess with them at all.
So how was your first Crafty Blog School class? I hope you enjoyed it! Is there anything you want to learn in the next class? Leave a comment, and see you next week! :)
All The Crafty Blog School Posts:
week 1: Where Do I Blog?
week 2: Choosing a Template
week 3: Name Your Blog & Create a Header
week 4: Blogging Photos from Flickr
week 5: How to Put that Darned Thimble Guy in Your Sidebar
week 6: How to Take Better Pictures of Your Crafts
week 7: Getting Noticed
Hi, I'm floresita, editor of Feeling Stitchy. I'm an avid stitcher, knitter, and crafter. You can see more of my stitching on Instagram and my blog. My vintage transfer collection is on Vintage Transfer Finds.
Feel free to email me with any ideas for the blog!
May 16, 2007
Pool Cool
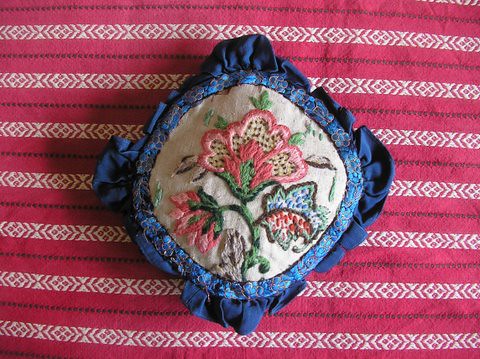
The last thing I want to share today is this really beautiful embroidered pincushion Feltbug found at a carboot sale.
(Don't tell anyone, but I found this in the pincushions pool)
May 15, 2007
Sources of Inspiration - The Göss Vestments
For extremely close up images of these vestments, visit the Rubens Art Server. (Be sure to NOT use the panorama viewer, you get much more detailed shots if you look at the images directly). Be prepared, there are lots of images (60 odd with amazing detail, you can count how many thread stitches are done over) and they are large (over 1 mb each).
Again, please note, there are swastika motifs on this work.
An example of how you can use elements of the patterns found in these items is at An Innocent Abroad where we have a nice pin cushion based on the vestments.
May 11, 2007
May 10, 2007
Show us your backside!
The backside of your embroidery, that is. :) This topic came up just the other day, which sent some of us scrambling to our projects to inspect our backsides. And I just want to take a minute to reassure everybody, really, your backside is ok. When you give a gift, do you think your friends are going to flip it over and say "ewwww"? No, they're too busy marveling at your amazing crafty prowess!
But, it doesn't hurt to keep your backsides neat and trim, like professor frenchie's...
For great tips on keeping your project backs spic and span, visit Primrose Design. Be sure to read all of Janet's Stitch School posts to really get schooled! And for those of you wondering (like I used to), "Come on, it's the back - how neat can it really look" - check out SheenaRamone's amazing stream.
Love your backside
But the main point of today's post is not backside envy. Love your backside, even if it's not perfect.
Have faith that the person fortunate enough to view your backside is too busy being amazed by your talent and beauty to notice an occasional lump or messy line.
And, show us your backside (ahem, embroidered, remember) here: http://www.flickr.com/groups/embroideredstuff/discuss/72157600192042991/
Hi, I'm floresita, editor of Feeling Stitchy. I'm an avid stitcher, knitter, and crafter. You can see more of my stitching on Instagram and my blog. My vintage transfer collection is on Vintage Transfer Finds.
Feel free to email me with any ideas for the blog!
May 9, 2007
Flickr loveliness
Love your stuff Shebrews!
May 8, 2007
Book Review: "Here By Wyverns: Hundreds of Patterns Graphed from Medieval Sources" by Nancy Spies
While this book is aimed at people interested in historical patterns, it would also be enjoyed by anyone with a love for fantasy, animals or border designs. All the patterns in the book have been converted to cross stitch graphs. The graphs are in black and white and very easy to read.
The book itself is divided into several chapters:
- Imaginary Creatures - dragons, basilisks, harpy, drollery, pheonix, wyvern etc
- Animals - bunnies, badger, hedgehog, bear, butterfly, snail, fox, lion, bull etc
- Water Creatures - fish, seahorse, mermaid, merman etc
- Architecture - castles, towers, tent, cathederal etc
- Birds - peacock, generic birds, eagle, goose, owl, pelican etc
- People - man on horse, marching men, guard, saints, knights, groups, musicians etc
- Lettering - Gothic Textura Quadrata, futhark, Irish Half Unical etc
- Overall Designs - geometric patterns, florals, trees, birds, hearts, stars etc
- Borders - divided into several sub chapters by period (6th-11thC, 12thC, 13th-14thC, 15th-16thC) repeating geometric, animals, hearts etc
- Odds and Ends - large single patterns, block motifs, keys, knots, boats, celestial etc
The book is 192 pages long, with four pages of colour plates showing some of the designs stitched up (something from just about each category is represented in this section). The book is spiral bound.
While there is no complete acknowledgements section to find where each pattern was sourced from, the original type of source (stained glass, embroidery, goldwork, carving), date and rough location is given so that most can be related to the original piece with a bit of research.
Also, think about visiting the website (click on cover above) there are several pages from the book to look at.
Why I Bought the Book
I am always interested in books that have patterns based on historical work. I liked this one cause it had some simple little motifs that I could use for quick projects and also more indepth patterns, such as the borders that I could use as a basis for decorating cloths (in my case, I would convert the designs back to free form embroidery, which in most cases is more appropriate for clothing).
Details:
- "Here by Wyverns: Hundreds of Patterns Graphed from Medieval Sources" by Nancy Spies
- Softcover: 192 pages including 4 colour plates
- Publisher: Arelate Studio (2002)
- ISBN: 0-9718960-0-3
May 7, 2007
Samplers
An embroidery sampler is defined as an example to be followed. Samplers are exactly what they sound like they would be, examples of different stitches. Historians say samplers started as a way of depicting events or stories in history and gradually the alphabet, motifs, and symbols were added. During the 19th century samplers became very important to the education of young girls in the preparation of their future roles of wives and homemakers. I can't say that samplers are made for those reasons today but luckily they are still stitched and making embroidery history.
How to Make an Embroidery Sampler:
1. Study sample designs in books, museums, internet sources, and antique stores.
2. Collect embroidery patterns for motifs, verses, or alphabets you hope to include.3. Combine elements. Draw a chart of your overall design.
4. Select fabrics, thread colors, and stitches.
5. Embroider your sampler and include your signature.
(provided by eHow)There are many styles of samplers being stitched today from the traditional sampler on the left made by Jennifer of moving hands. . .
. . . to the witty sampler made on the right by flickr member, artg33k.
And of course the beautiful redwork sampler made by the ever popular, Redwork in Germany.
-----------------------------------------------
* For examples and patterns of primitive samplers check out the selection at Chestnut Junction.
* Here is a list of books all about samplers from Amazon.
* And if you are looking for free patterns, Vintage Transfer Finds has motifs and alphabet letters just for you.
May 3, 2007
Mexican Fiesta!
I'm gonna be 100% honest with you and admit that I have no clue what Cinco de Mayo is about.
But everyone knows this holiday is a good excuse to consume lots and lots of tequila and give a few "gritos" (if you've never heard a grito, by the way, just drink a bunch of tequila and you're bound to do one eventually)... :)
Well, before you let loose with that tequila this weekend, why not try some of these crafty Mexican-themed ideas:
Sugar Skulls
Check out this lovely sugar skull posted by wardi!
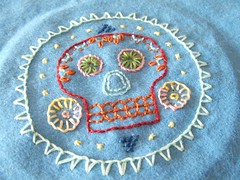
Or this awesome sugar skull embroidered by ykitty. Does that pattern look familiar? It's one of Jenny Hart's amazing Day of the Dead patterns.
Want to stitch your own sugar skull? Try this beautiful free cross-stitch pattern posted by xladyluckx on Craftster!
Mexican Dresses
I have always been inspired by Mexican embroidery - as a child I had a few "Mexican dresses" which I treasured.
Want to make and embroider your own Mexican dress? Try this pattern.
Also, be sure to visit Karen Elwell's (Teyacapan) inspiring photosets, Mexican Indian Blouses and Mexico Viejo for inspiration!
Vintage Kitsch
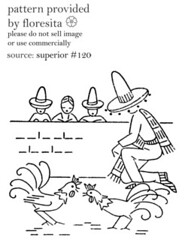
Want to celebrate Cinco de Mayo, but don't have dinero for patterns? Try these cute Mexican freebies I posted on my Vintage Transfers blog!
Are you inspired yet? Get stitching!
Hi, I'm floresita, editor of Feeling Stitchy. I'm an avid stitcher, knitter, and crafter. You can see more of my stitching on Instagram and my blog. My vintage transfer collection is on Vintage Transfer Finds.
Feel free to email me with any ideas for the blog!